1-608-509-2148 [email protected]

Divi Specialty Section Fullwidth

I love using ET’s Divi theme but sometime there are things that they did that make no sense, like this one.  For some reason they decided it would be a good idea to add a right and left margin or padding to all of the ‘Specialty Sections’ and when you enable the ‘Fullwidth’ option in the ‘Advanced Design Settings’ tab it doesn’t actually work.  Well, with a bit of CSS you can fix it!

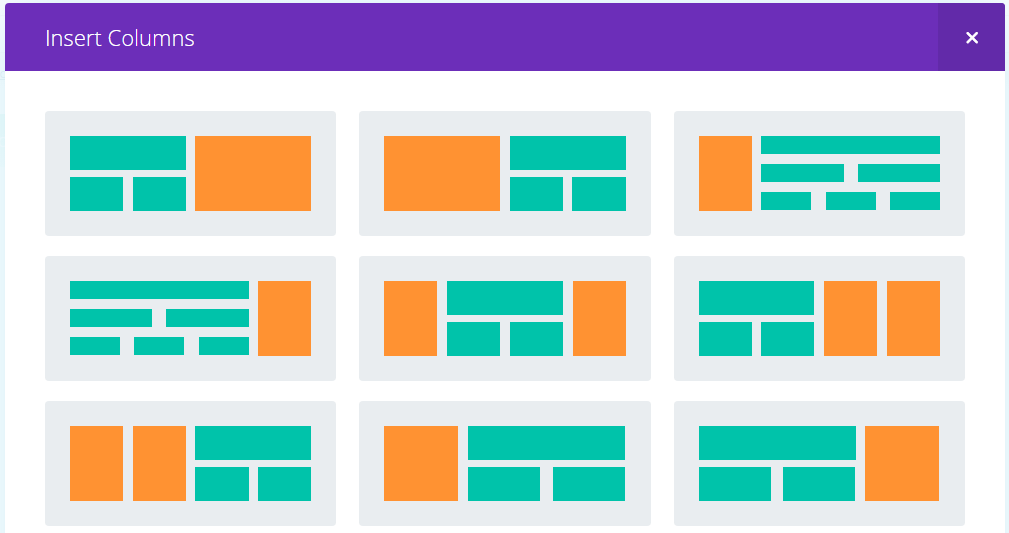
The first thing you need to do is select one of the ‘specialty section‘ layouts of your choice, any one will work.

Now open up the Section Settings, click on the ‘Custom CSS tab’ of your section and add in a Custom CSS Class, I’m using ff-fullwidth-specialty, then save & exit

In the specialty section ‘Advanced Design Settings’ tab there are options to make the section fullwidth. However, this doesn’t work like it does on standard sections and your content will not reach to the edge of the screen as you would expect it to so there is no need to activate it, we are going to do that with CSS instead.

Copy and paste the code below into your Child Theme style.css or if you aren’t using a child theme (which you really should be) then paste into the Divi Theme Options epanel custom CSS section and don’t forget to save.

/*--------------Fullwith Specialty Section----------------------*/
 .ds-fullwidth-specialty> .et_pb_row {
 min-width: 100% !important;
 }

Now you will need to add in the columns, rows and modules you want to use in your specialty section. I’m not going to go through each one as with nine layouts to choose from and 40+ modules there are too many variations to consider, but you get the idea.

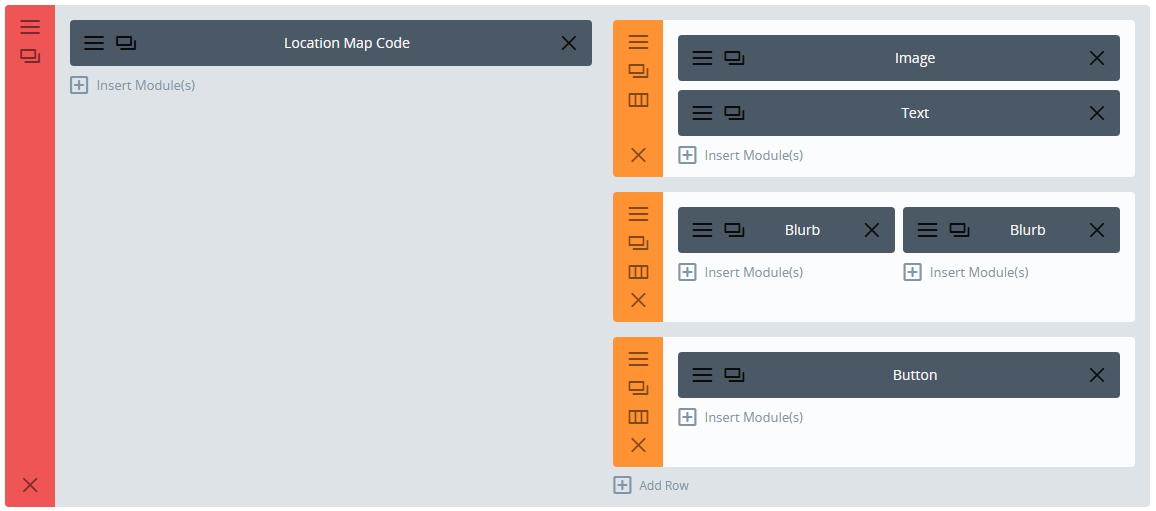
You will also need to play around with the padding values in the section, rows and modules to get it looking just how you want.

Divi Toggle vs. Accordion

Toggles using margin-top: 50px!important;

Toggle1

Insert some text here

Toggle2

Insert some text here

Toggle3

Insert some text here

Accordion using customer Gutter of 4.

Accordion1
Accordion2
Accordion3

Accordion using customer Gutter of 3.

Accordion1
Accordion2
Accordion3

Accordion using customer Gutter of 2.

Accordion1
Accordion2
Accordion3

Accordion using customer Gutter of 1.

Accordion1
Accordion2
Accordion3

Accordion using no custom Gutter

Accordion1
Accordion2
Accordion3

Divi Hidden Section

  • Add this CSS Code to your Divi, Theme Options, Custom CSS.

#responsive_section {
display: none;
}

  • Add the following JS code to the Divi, Theme Options, Integration, <HEAD>. Be sure that you have “Enabled” the header code.

<script>
jQuery(document).ready(function($){
$(“a.responsive”).click(function(){
$(“#responsive_section”).show(1000);
$(‘html, body’).animate({
scrollTop: $(“#responsive_section”).offset().top
}, ‘slow’);
});
});
</script>

Go to the Page that you want the hidden Section to be on and create the following.

  • Create a Standard Module Section with a single column
  • Add a “Text” module to hold your “button” or “link” that you will use to open the hidden Section.
  • Create your link in the “Text module you added earlier, assign it the ‘class’ of “responsive” which tells the JS to open the hidden section.
    • Example: <a class=”responsive” href=”#”>Click here to open the hidden section</a>
  • Create another Standard Module Section and assign it a “CSS ID” of “responsive_section” which relates to the CSS code below. You can put whatever you want in this Section, this is what’s hidden until you click the link to unhide it.

This is the hidden bit

Lorem ipsum dolor sit amet, consectetur adipisicing elit, sed do eiusmod tempor incididunt ut labore et dolore magna aliqua. Ut enim ad minim veniam, quis nostrud exercitation ullamco laboris nisi ut aliquip ex ea commodo consequat. Duis aute irure dolor in reprehenderit in voluptate velit esse cillum dolore eu fugiat nulla pariatur. Excepteur sint occaecat cupidatat non proident, sunt in culpa qui officia deserunt mollit anim id est laborum.